|
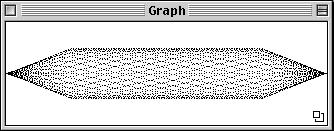
Computer Music: Musc 216 Using the ENVELOPE GENERATOR An ENVELOPE is usually defined as the shape of a sound's amplitude over time (although an envelope can also be applied to other aspects of a sound such as the frequency). Here is a graph of a simple envelope applied to the amplitude of the original Simple SYD Patch (which was created in the 1st tutorial): Click the link below to hear the sound: Envelope1.aiff
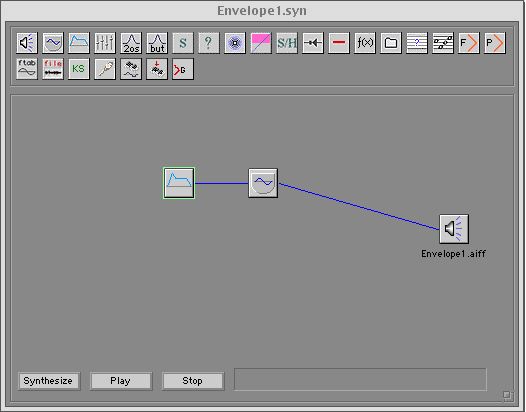
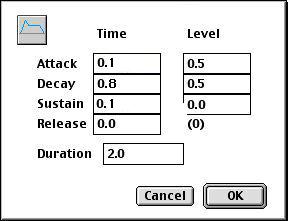
An envelope with this shape is usually called a "woodwind" envelope and has a total of 3 points (nodes): ATTACK, SUSTAIN, DECAY. An envelope with this shape is typical of sounds made by BLOWING into a musical WIND instrument such as a clarinet, flute, oboe, etc. A sound's (amplitude) envelope is just as important to the overall recognition of the sound as the waveform itself. In the above sound with the envelope applied, there was a relatively short "attack", a longer "sustain" and then a relatively long "decay." These three terms are usually used to describe the basic points (nodes) of an envelope. If some kind "controller" instrument is used (for example a keyboard) to play the sound when a key is pressed, then another point or NODE can be described for what happens when the key is RELEASED. Sophisticated synthesizers and software will have more than just 4 nodes. An envelope is usually applied to the entire duration of the wave. For example, if the wave is 2 seconds long, then the envelope will also be 2 seconds long. The specific points or nodes of the envelope (ADSR) are then placed proportionally along the length of the wave. In the above wave (which is 2 seconds long), the Attack is .1 (10%), the Sustain is .8 (80%), and the Decay is .1 (10%). These proportional values add up to 1.0 which represents the entire duration of the wave (2 seconds), in other words, 100% of 2 seconds. If the wave and amplitude was 6 seconds, the nodes would still have the same proportions. The following tutorial will show you how to add the above envelope to the 1st Simple SYD Patch which you created the first tutorial. Do this:
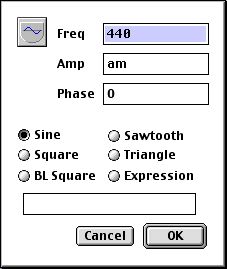
The values in the left fields (Time) represent the points or NODES of the envelope as described above (ADSR). The values in the right fields (Level) represent the actual amplitude values which this operator will pass to the variable "am" in the amplitude field of the Oscillator operator.
Back to the SYD Tutorials Index |